How to Remove Old Window Film: DIY Tips

Over time, window film often shows signs of wear, like bubbling, fading, or peeling edges. When this happens, removing the old film is an easy way to refresh your windows, making them look and work better. This guide covers simple, safe steps for taking off outdated film yourself, or you can always choose services from the team of Commercial Window Tinting.
Why remove old window film?
Old window film does more than just look bad; it can affect how well your windows function. Aged film often loses its ability to block UV rays, manage glare, or maintain privacy.
Signs it’s time for removal:
- Bubbling. Bubbles mean the adhesive is failing, which makes the film less effective at blocking sunlight and keeping your space private. So, this isn’t just a cosmetic issue but a sign of lost functionality.
- Peeling edges. When the film starts peeling at the edges, it’s a sure sign it’s detaching from the glass. This weakens its ability to insulate and block harmful UV rays, compromising your comfort.
- Fading or discoloration. The faded or discolored film loses its UV-blocking power. This means less sun protection and reduced energy efficiency for your indoor space.
- Reduced effectiveness. Over time, old films just don’t perform like they used to. If you’re noticing more glare or less privacy, it’s likely the film can no longer deliver its original benefits.
Replacing worn-out film with new, high-performance options restores these essential features, helping maintain comfort, privacy, and efficiency, and we can help with this.
DIY window film removal: Step-by-step guide
Taking off old window film yourself can save some cash, and it’s pretty doable if you don’t mind a bit of hands-on work.
Step 1: Gather your tools and materials

Here’s a quick list of tools to get you started:
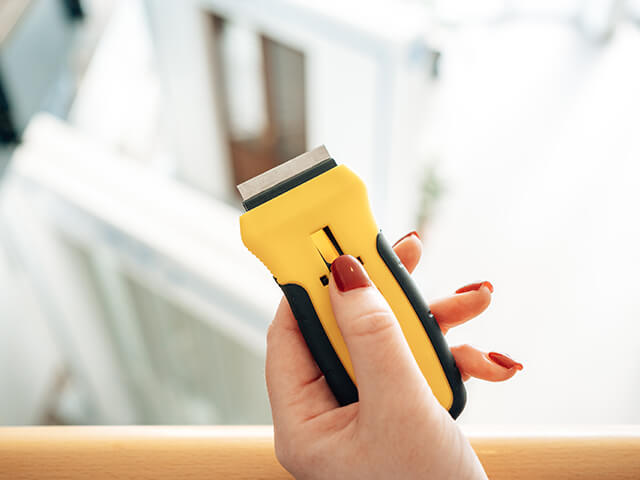
- razor blade or utility knife – for carefully lifting the edges of the film
- spray bottle with soapy water or ammonia – to soften the adhesive
- heat gun or hairdryer – for loosening up stubborn film
- scraper (plastic or metal) – to help remove any stuck-on bits
- adhesive remover (optional) – handy for cleaning off any sticky residue
With these essentials, you’re all set to start tackling that old film without scratching up your windows.
Step 2: Preparing the window surface
First things first—make sure you have a clean, clear space to work. Move any furniture or decor away from the window so you’ve got room to maneuver. Give the glass a quick wipe-down with soapy water or a glass cleaner. This isn’t just to be tidy; a clean surface makes it easier for your tools to grip the film and keeps dust or dirt from causing extra hassle during removal.
Step 3: Use heat for easy removal
Grab a heat gun or hairdryer, set it to medium or high, and hold it a few inches from the window. Move it back and forth over a small area of the film. The heat makes the glue soft, so the film peels off easier and leaves less sticky stuff behind.
Keep working on one section at a time and test if the film is loose enough to pull off.
Step 4: Peel off the film carefully
Pick a corner of the window and use a razor blade or utility knife to lift the edge of the film. Once you can grab it, start pulling it back slowly at a low angle. If it starts to rip or gets stuck, give it another blast of heat to help loosen things up.
Go easy—keeping the film in one piece makes the whole job a lot smoother.
Step 5: Clean off the sticky stuff
After peeling off the film, you’ll probably see some glue left on the glass. Spray the spot with soapy water or adhesive remover, and let it sit for a minute to soften up. Then, take your scraper and gently scrape away the sticky bits. Wipe it down with a cloth, and if there’s still some gunk left, just repeat until it’s all gone.
Common mistakes to avoid

Removing old window film is usually simple, but a few mistakes can make things harder or even damage your windows. Here’s what to avoid:
- Scratches on the glass. Applying too much pressure or using the wrong tool, like a metal scraper, often leaves scratches on the window. Using a plastic scraper keeps the glass safer.
- Not using heat. Heat softens the adhesive and loosens the film. Without it, the film may tear into small pieces that are tough to remove.
- Rushing the job. Pulling off the film too quickly often leaves adhesive behind. Removing it slowly leads to a cleaner finish and less work for you.
Avoiding these common mistakes makes the job easier and helps keep your windows in good shape.
When to consider professional help
Sometimes, taking off old window film is just easier with a professional, especially if you’re dealing with big windows or delicate glass. A pro can make sure the job is done right, saving you time and avoiding the hassle if the film is stubborn or covers a large area.
Why a pro might be worth it:
- They know the tricks. Pros have the tools and skills to remove film without scratching the glass or leaving sticky bits behind.
- It’s quicker. They can get the job done fast, which is a big help for large windows or a lot of windows.
- They handle delicate glass. For specialty or fragile glass, pros know how to avoid any damage.
If you’re ready to let the experts handle it, Commercial Window Tinting offers removal services that make the whole process smooth and worry-free.

Request Quote
Illuminate Your Space: Window Tinting Excellence Awaits. Request a Quote for Customized Solutions, Blending Style, Comfort, and Energy Efficiency. Transform Your Windows Today!